![]()
docker-mailserver is inspired by the renowned ISPMail guide.
This project lets you run your own email services, giving you independence from large providers. It is a secure, customizable, and feature-rich solution for managing your email infrastructure.
Container images are built on Alpine Linux or vendor base images and are kept lightweight.
![]()
![]()
- Secure email protocols: POP3, IMAP, and SMTP with user authentication
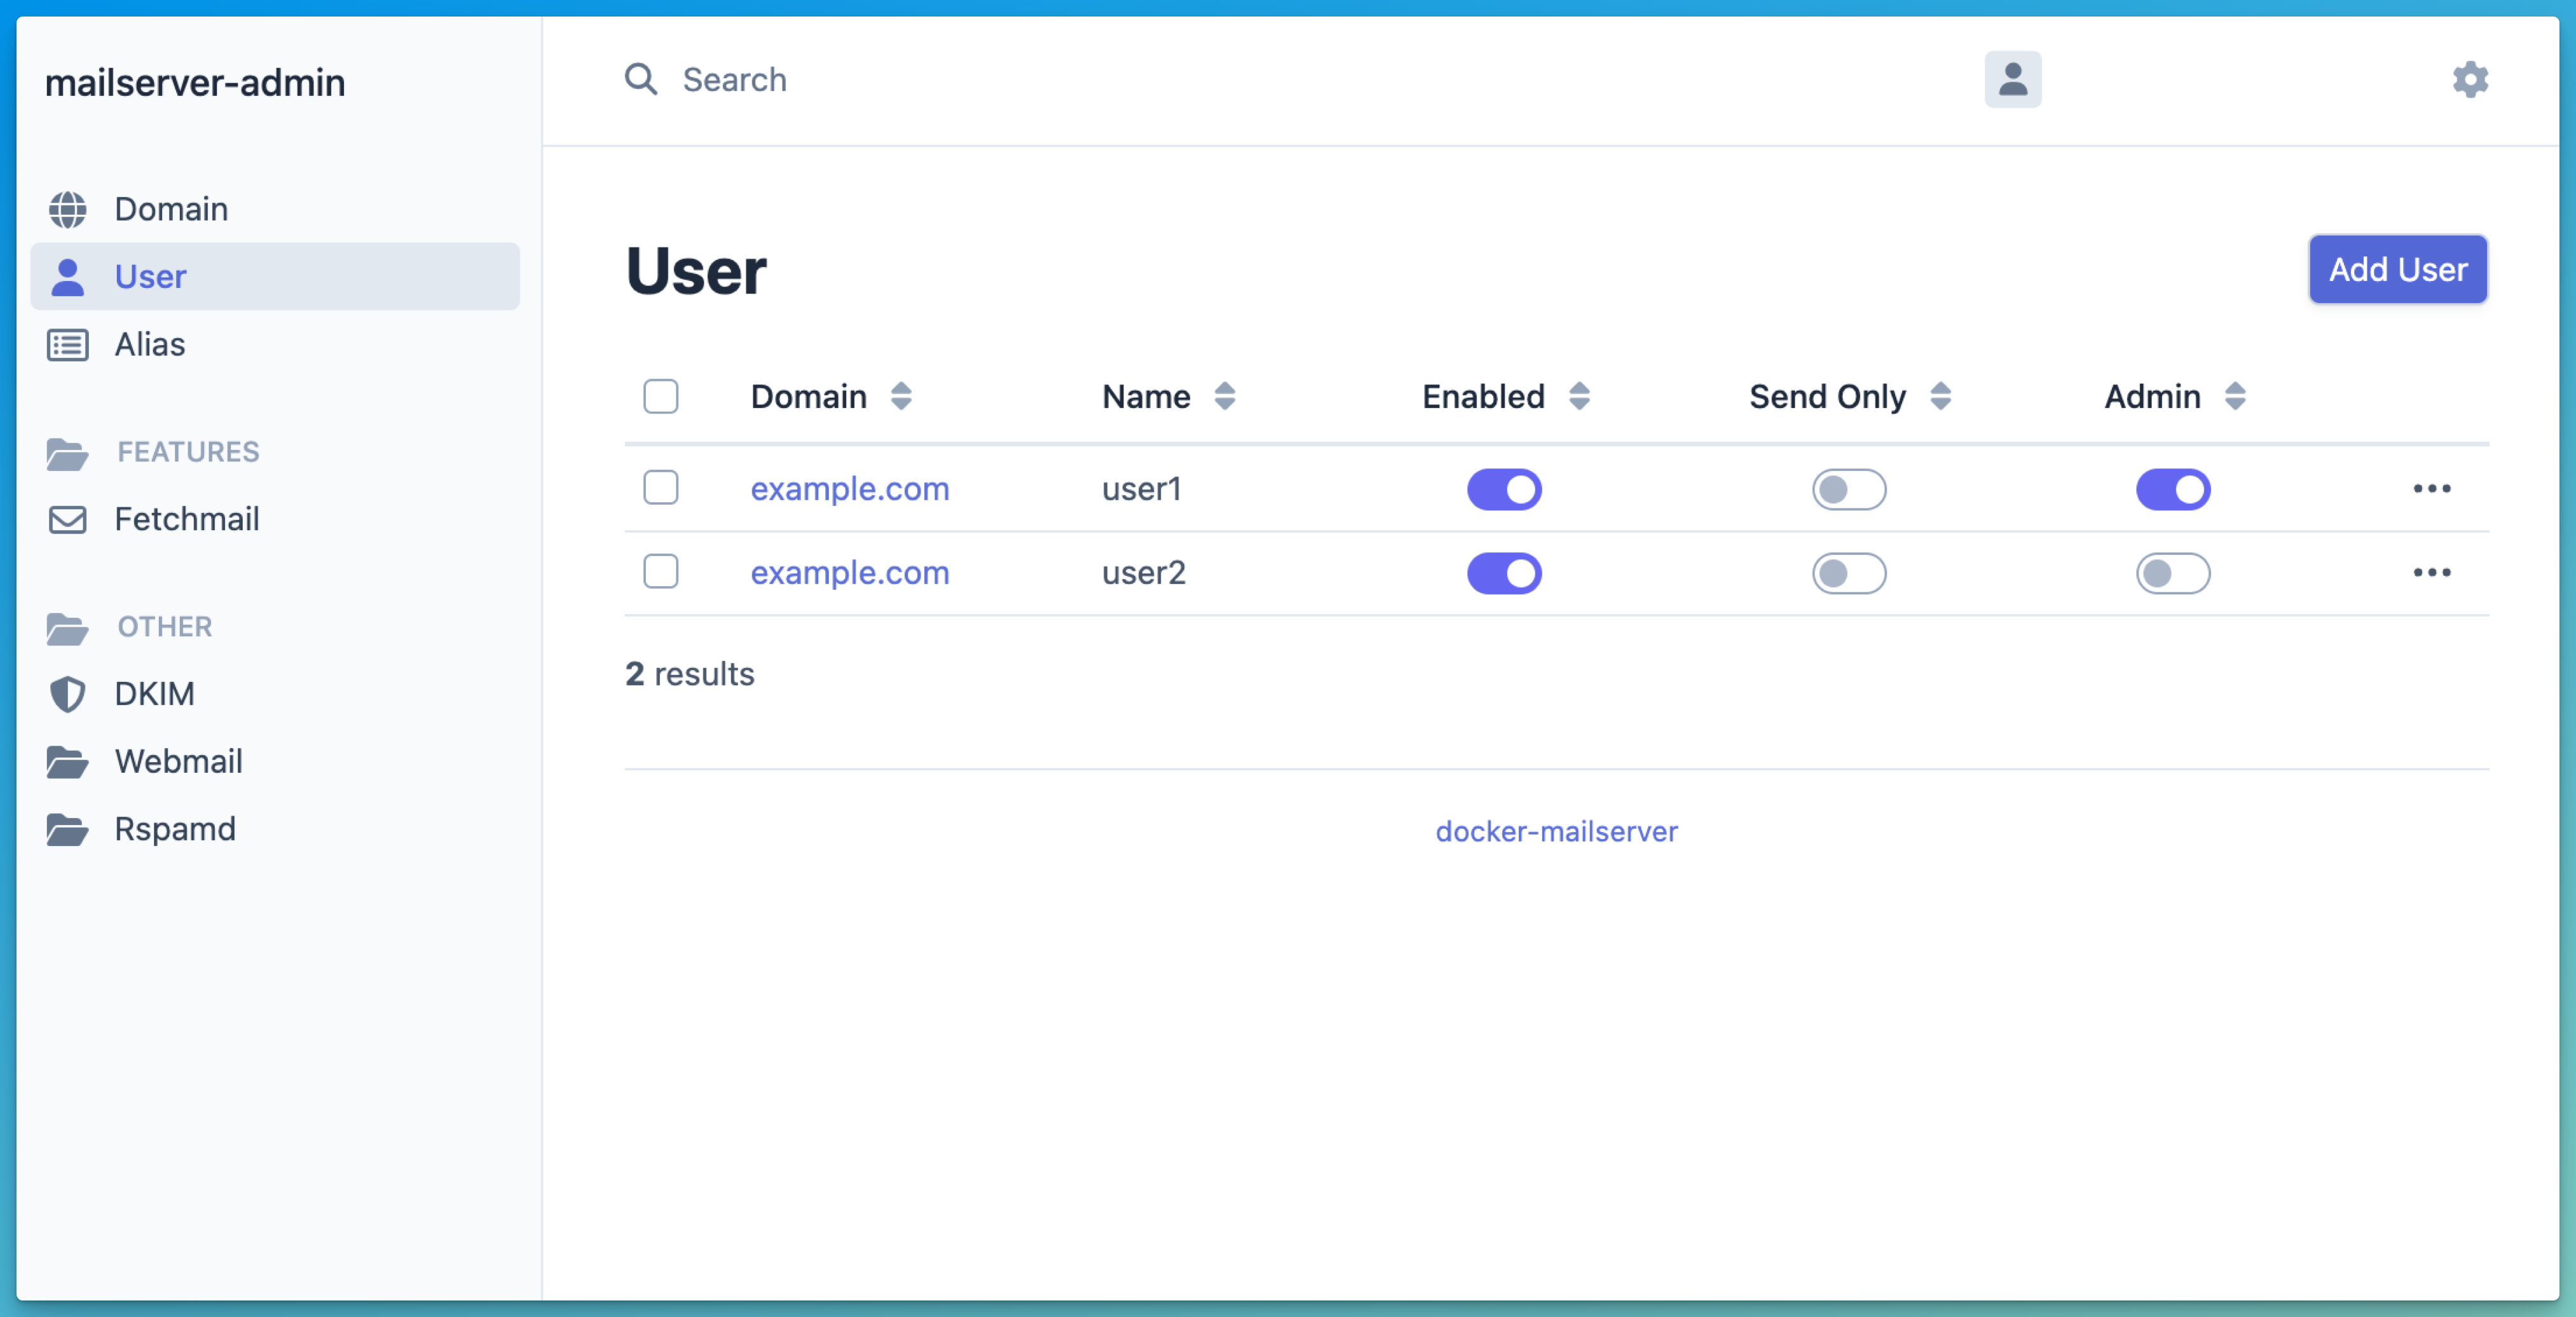
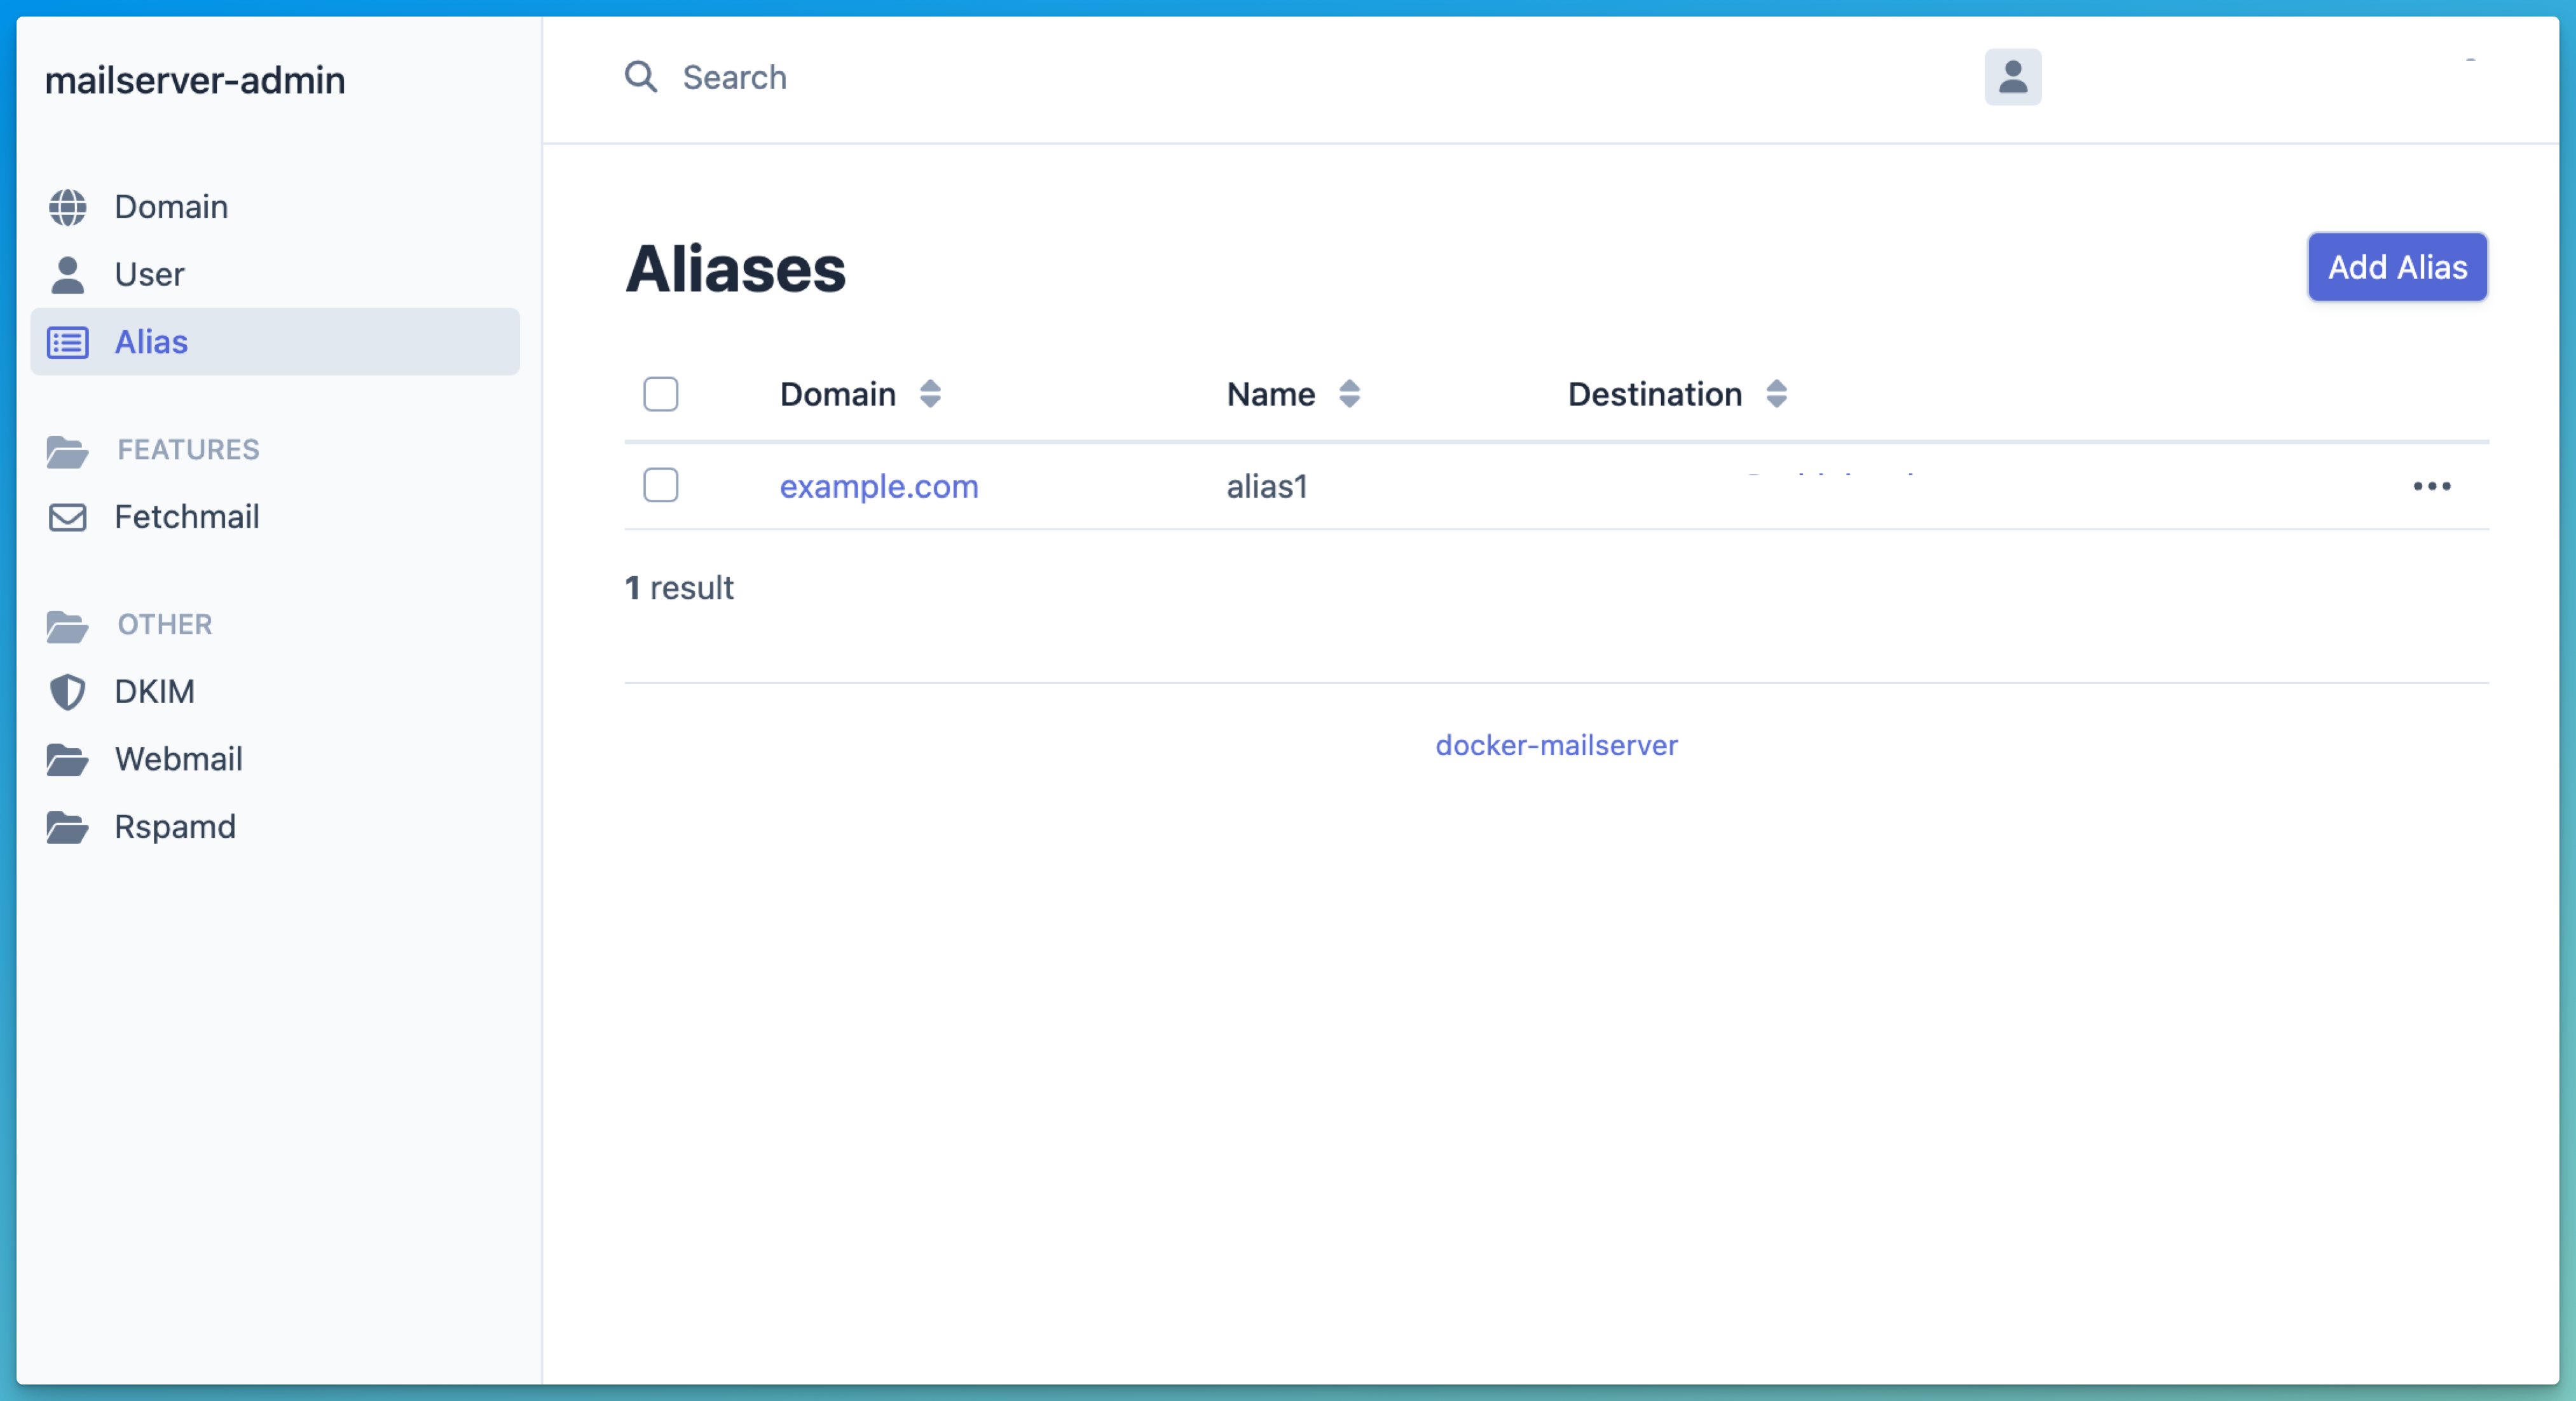
- Web-based management interface for account, domain, and alias administration
- Intuitive webmail interface
- Fetchmail integration to retrieve emails from external providers
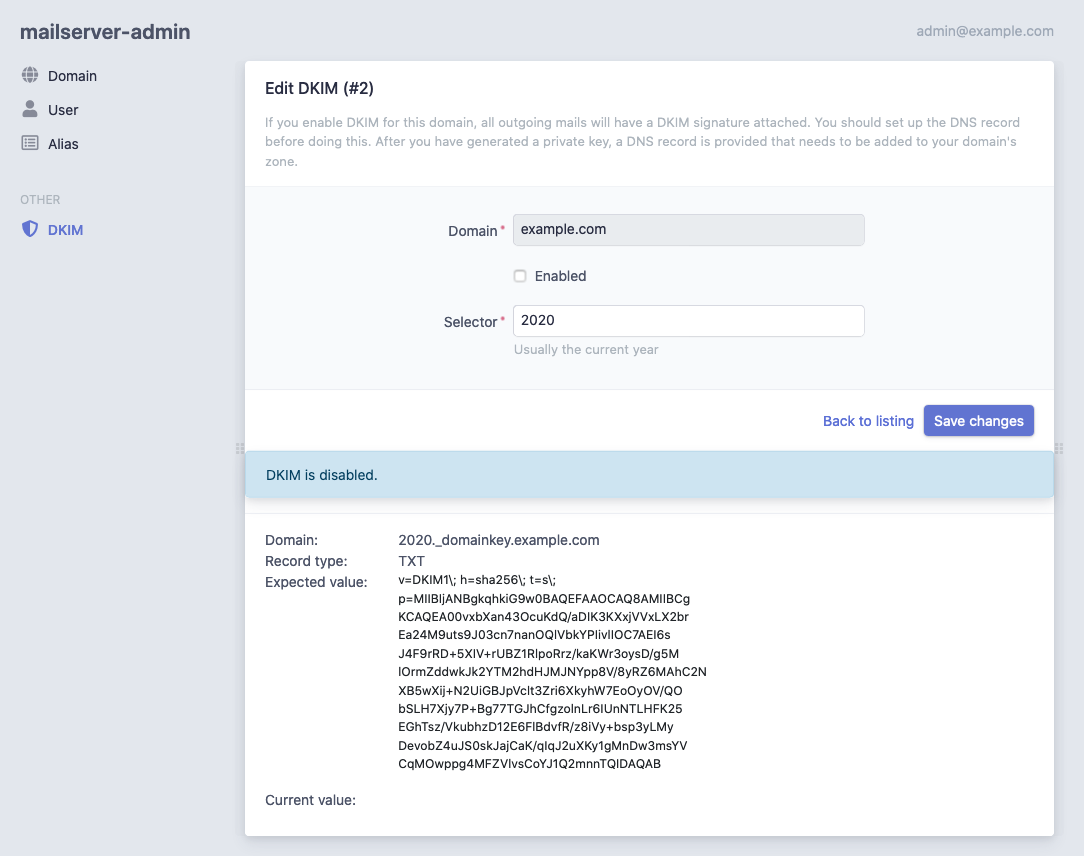
- DKIM message signing for email authenticity
- Server-side mail filtering with configurable rules via a web frontend
- Spam filter training by simply moving emails to or from the junk folder
- Real-time spam prevention using RBLs (Real-Time Blackhole Lists)
- Selective greylisting for likely spam
- Support for catch-all email addresses
- Support for send-only accounts restricted from receiving emails
- Restriction of sender addresses for enhanced security
- Configurable address extensions using the '-' delimiter
- Quota management with notifications when quotas are exceeded
- Enforced TLS for secure communication
- Full-text search (FTS) support for efficient message searching
- Continuous self-monitoring via Docker healthcheck
- Developed with a strong focus on quality assurance
- Run
git clone git@github.com:jeboehm/docker-mailserver.git - Copy the file
.env.distto.envand change the variables in it according to your needs. The variables are described in the docs. - Run
bin/production.sh pullto download the images. - Run
bin/production.sh up -dto start the services. - After a few seconds, you can access the services listed in the section Ports overview.
- Create your first email address and an admin user by running
bin/production.sh run --rm web setup.sh. The wizard will ask you a few questions to set everything up. - Now you can log in to the management interface with your new account credentials.
Kubernetes installation is a first-class citizen. You can use the kustomization.yaml file to deploy the mailserver to your Kubernetes cluster.
Important: Installing on Kubernetes requires an existing MySQL-compatible database (for example, MySQL or Percona XtraDB).
The provided kustomization does not provision a database. Configure the database connection in your .env and supply
credentials as Kubernetes Secrets before applying the manifests. See the
Kustomize External Database and HTTPS Ingress Example
and the documentation Use another MySQL instance for details.
- Run
git clone git@github.com:jeboehm/docker-mailserver.git - Copy the file
.env.distto.envand change the variables in it according to your needs. The variables are described in the docs. - Run
kubectl create namespace mail - Run
bin/create-tls-certs.sh - Run
kubectl create -n mail secret tls tls-certs --cert=config/tls/tls.crt --key=config/tls/tls.key - Run
kubectl apply -n mail -k .
| Service | Address |
|---|---|
| POP3 (STARTTLS required) | 127.0.0.1:110 |
| POP3S | 127.0.0.1:995 |
| IMAP (STARTTLS required) | 127.0.0.1:143 |
| IMAPS | 127.0.0.1:993 |
| SMTP | 127.0.0.1:25 |
| Mail Submission (STARTTLS required) | 127.0.0.1:587 |
| Management Interface | http://127.0.0.1:81/manager/ |
| Webmail | http://127.0.0.1:81/webmail/ |
| Rspamd web interface | http://127.0.0.1:81/rspamd/ |